We’re thrilled to offer our future guests a hands on beekeeping experience with our delightful friends at Calenny Orchard, just a 5 minute drive from Markdale.
Bees are so important to our livelihood as they help to pollinate most of the crops we eat and many that feed farm livestock.
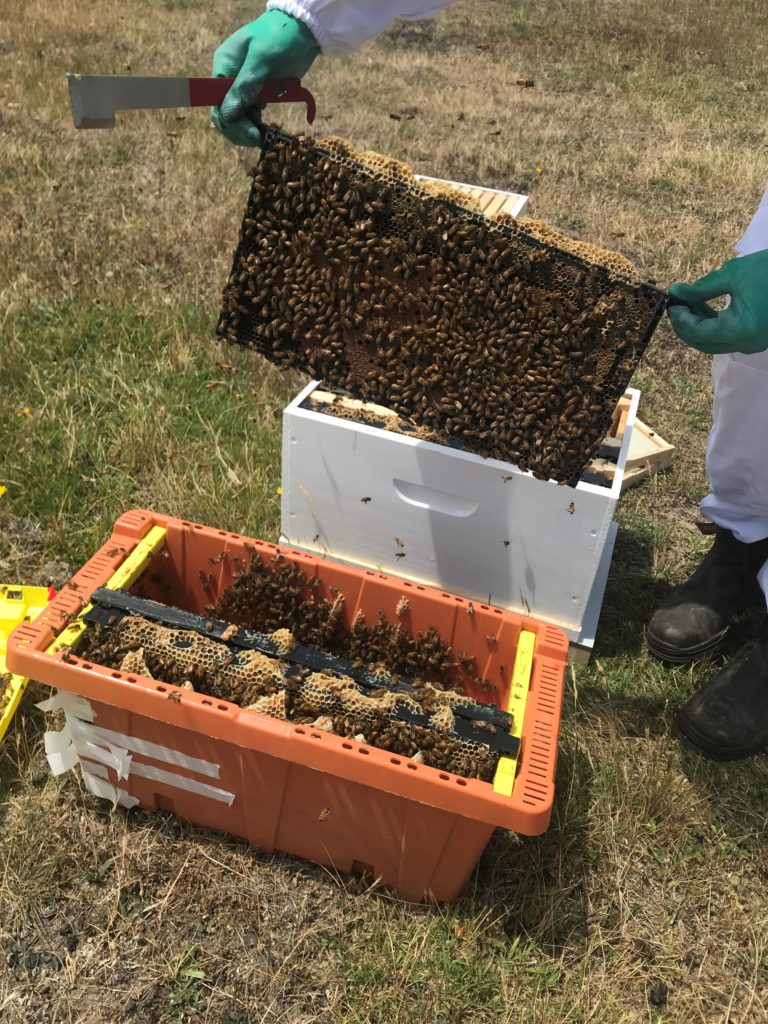
Between October and March you can book your place in their outdoor classroom. You will be protected in a beekeepers suit and learn about honey bees, how they forage, collect pollen, make honey and their amazing colony structure from their experienced beekeeper.
At the conclusion of the honey bee experience, you will indulge in a honey tasting, learn how it is graded and in doing so will become a connoisseur and knowledgeable of raw honey.
Beekeeping Experience Price List*
Adults $70.00( 13 years +)
Children $50.00 ( 10-12 years)
www.calennyorchard.com.au
calennyorchard@gmail.com
P: 02 4835 3017
*Prices are subject to change
Image and logo credit: Calenny Orchard
Homegrown garlic is beautiful to have on hand and after the bulb is dried will last for many months. However, this year we also decided to pickle some of our garlic to extend the life a bit longer.
This is an easy recipe that can be easily adapted depending on your preferred herbs or flavours – the key is to keep the pickle in the fridge. Once ready the garlic is perfect in pasta, with roasts, on antipasti platters (for the game) – basically everything is better with garlic!
Ingredients
1/4 cup canning salt
2 tablespoons caster sugar
4 cups white vinegar
1 cup water
1kg fresh garlic peeled
Crushed chilli flakes*
Fresh dill
Whole peppercorns
*Note: any herbs or spices can be used in place or in addition to chill / dill. Bay leaves, mustard seeds, cumin seeds and rosemary are just some examples of additions.
Method
- Combine canning salt, sugar and vinegar in a large saucepan. Bring to boil; reduce heat and simmer 10 minutes.
- Meanwhile, add spices and herbs to sterilized jars*. Then pack peeled garlic cloves leaving about ½ – 1cm of headspace.
- Using a ladle, divide hot pickling liquid between the 4 jars, leaving 1/2-inch of headspace. Tap the jar gently on the counter to help release additional trapped bubbles, clean jar rims, and close lids.
- Allow to cool to room temperature and then chill in the refrigerator for at least 3 weeks before opening. Can be stored in refrigerator for up to 4 months.
*The jars can be sterilised a number of ways (google will help) – we found heating them in a 120 degree oven for 15 – 20 minutes the easiest.
This is a perfectly simple and delicious brunch recipe that heros the beautiful fig from their late summer harvest.
This recipe is enough for 4 people and would go well with a crisp sparkling wine.
Ingredients
150 – 200 grams prosciutto
6 figs
200 gram ricotta
4 crumpets
honey (to drizzle)
Method
- Place ricotta in mixing bowl and beat on medium speed (using an electric mixer) until cheese is smooth and spreadable.
- Toast crumpets.
- While crumpets are toasting cut the figs into quarters and separate the prosciutto ready for assembling.
- Spread the ricotta mixture evenly between the crumpets.
- Top with figs, prosciutto and drizzle with a generous amount of honey to serve.
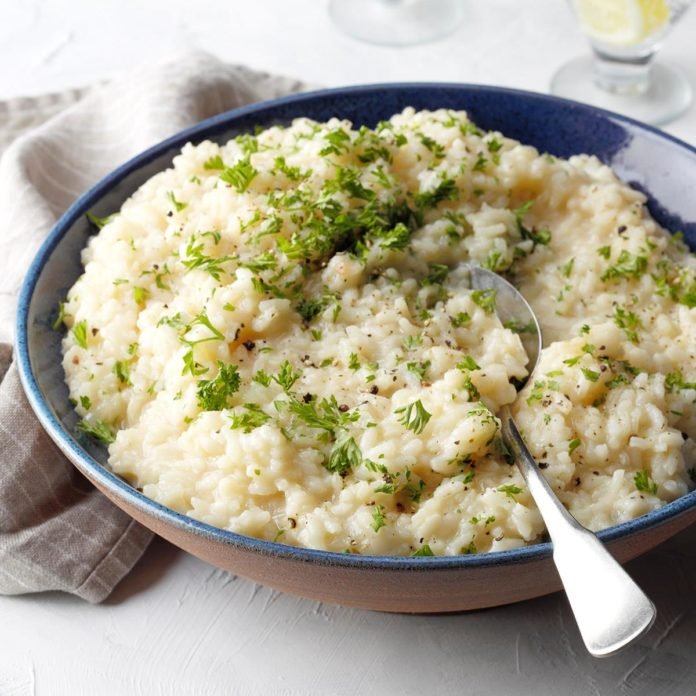
Autumn grown cauliflower is abundant at the farm and will continue to grow throughout the winter months. This recipe is comfort food at its best – slow and cathartic to cook, and warming to eat. It is a vegetarian recipe, but bacon, pancetta or ham could easily be added.
Best cooked and eaten with a clean white like Fiano or a light Southern Highland pinot noir.
Ingredients
1 brown onion diced
Head of cauliflower (chopped)
6 cups of chicken stock
1 cup of arborio or carnaroli rice
Fresh thyme
100gms of taleggio cheese (or if not available brie or camembert can be substituted
Butter
1 cup of white wine
Good handful of grated parmesan
Method
- Pre-heat oven to 180c
- 15 mins before you start the risotto, toss half the cauliflower in olive oil and salt and pepper and roast for 25-30 mins. The cauliflower should be brown but not burnt.
- Gently fry the onions and thyme in some olive oil and a good knob of butter.
- When onions are translucent add rice and other half of the chopped cauliflower. Stir for 2 – 3 mins to coat.
- Add wine and simmer for until reduced by half.
- Add stock, a ladle at a time, stirring until stock is absorbed. Slow and steady at this stage with a glass of wine in one hand and wooden sppon in the next.
- Continue with remaining stock until rice is al’dente and stock is absorbed (this will take 20-25 minutes).
- The finishing touch is to turn off the heat – put the chopped taleggio cheese, parmesan and a knob of butter ontop of the risotto and put a lid on.
- Let is set for 5 mins and then stir the melted butter and cheese through the risotto as well as the roasted cauliflower before serving.
Albeit treated as a weed and nuisance in the paddock, the dark sweet fruit from our blackberry trees makes excellent jam in the kitchen. This is best served on hot, buttery toast with a cup of coffee.
Ingredients
500gms of blackberries
500gm of jam sugar
1 lemon
Method
1. Place two small plates in the freezer.
2. Combine blackberry and sugar with the finely grated rind and juice of one lemon in a heavy based saucepan.
3. Bring to the boil and simmer for 35-40 mins (stirring occasionally but careful not to break up the fruit).
4. Test the jam consistency by spooning a small amount onto a chilled plate. Run your finger through it to draw a line.
If the jam stays apart (i.e. does not run) it is ready. If not continue to simmer for another 5 – 10 mins and try again.
5. Once ready spoon into sterilised jars and seal.
6. Keeps for 3 – 6 months in a dark spot. Consume within a month of opening and keep in the fridge.
The beginning of Summer saw our garlic being harvested – Italian Red and Melbourne White varieties that we planted in late March. Pungent and fragrant they deserve to be the star of the dish.
The family loves them in the famous Italian recipe spaghetti algio e olio. This is the simplest of pasta dishes and a perfect late night meal.
The recipe below is for 3-4 people. Garlic is the hero of this dish so don’t be shy!
Ingredients
4-6 cloves of garlic crushed and chopped fine
A handful of chopped flat leaf parsley
Chilli flakes (to taste)
Salt and pepper
Olive oil (good lug)
Dried spaghetti
Method
Cook spaghetti al dente
Put the oil, garlic and chill flakes in a fry pan and heat on medium heat
Once the garlic start so to go golden turn off the heat and throw in chopped parsley
Toss through the cooked spaghetti with a small amount of the pasta water and season with salt and pepper
Serve with parmesan cheese and a crisp white or dry vermouth
We were very happy to welcome our first beehive last week!
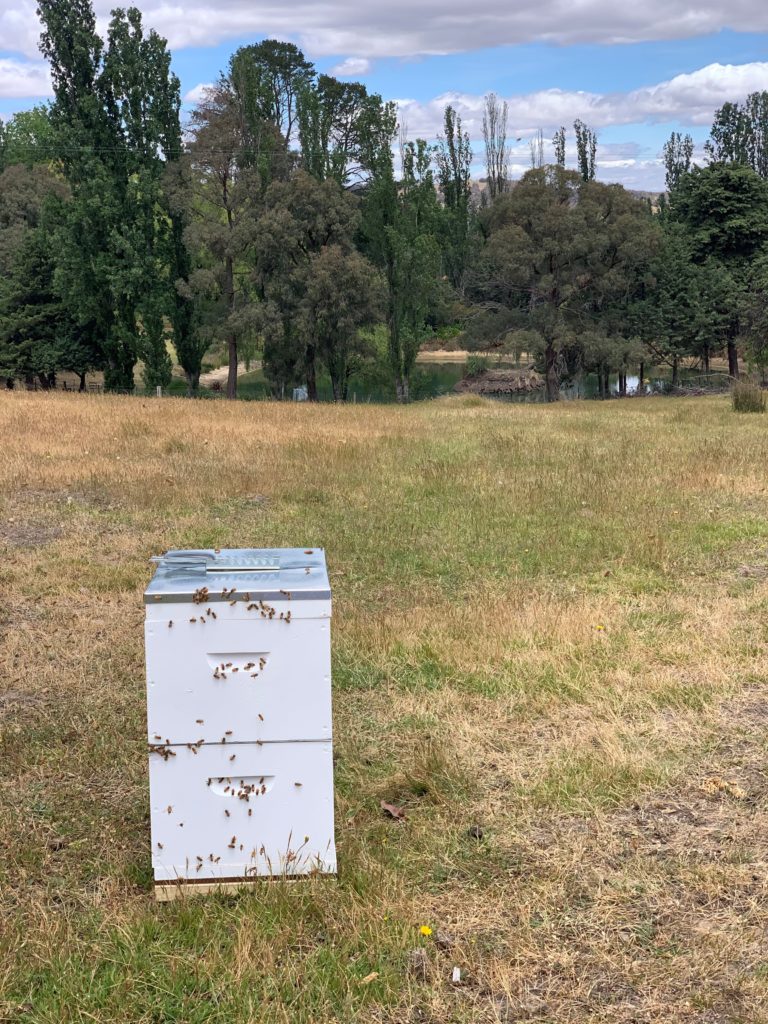
Before the sun broke on Sunday our novice (but registered) beekeepers closed the nucleus box full of bees and drove from Sydney to the property. The ideal locations for the new hive were scouted – the bees need to be close to water and of course flowers. After careful consideration a decision was made to put the hive in the ram paddock behind the the homestead. As you can see from the photos this vantage point gives easy access to both the lake and the wonderful flowers in the garden. After allowing the bees to acclimatise to the environment for a few hours the queen and her colony were officially relocated into their new hive and left to settle in.
At Markdale we understand that bees are a critical part of our ecosystem and are integral in agricultural pollination as well as food production. Unfortunately however the global population of bees is in decline. Australia is experiencing the same issue very acutely at the moment given the drought conditions ravaging the east coast of Australia and the devastating bush fires. Our hope with our little hive is to increase the population of bees on Markdale Station, produce honey for our family, friends and guests and raises awareness about the positive impacts of bees on the environment.
Our bees were purchased through the Urban Beehive based in Matraville – we’d like to thank Doug and Vicky for their help and crash course on transportation! We’d encourage anyone who wants to find out more to visit their website (https://theurbanbeehive.com.au/).
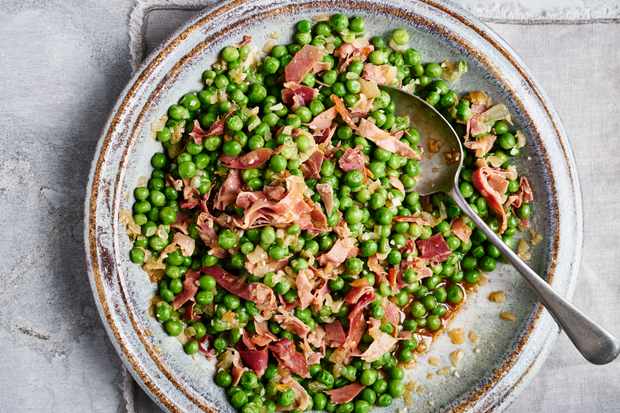
One of the joys to come out of the Winter veggie patch were our fresh baby peas. Sweet and crunchy they were good enough to simply shell and eat raw. We wanted however to share an ‘unusual’ side of dish of peas and lettuce that is popular in France and our table, and goes fantastically with roast chicken or fish accompanied by something white and sharp.
Ingredients
2 – 3 handfuls of freshly shelled peas
1 brown onion (diced finely)
100gms of pancetta (cut into strips) *note that bacon or lardons will also work
1 iceberg lettuce (washed, cored and shredded)
2 cups of good quality chicken stock
Handful of mint
Good knob of butter
Method
Step 1 Melt butter with a little olive oil in a heavy based fry pan over a medium heat.
Step 2 Add onions and pancetta and cook until onions are soft.
Step 3 Adds peas, mix and then add stock and bring to the simmer. Reduce by a third. Season with some white pepper *note pancetta and the stock are salty so there may be no need to add additional salt.
Step 4 Add lettuce and mint. Mix through the warm stock. Cook for 1 min until lettuce begins to welt.
Step 5 Ladle into a serving bowl (including broth) to be eaten immediately.
As autumn approached the last of the summer veggies were removed – including our fabulous and abundant tomatoes. Left with a few kilos of green tomatoes we decided to try our hand at a chutney in anticipation of ploughman’s lunches.
Outlined below is our very simple recipe – brought together from various sources and best attempted with a glass of wine in hand. Lots of old jars are required.
Ingredients
2kg of green tomatoes (chopped – cut the small ones in half and the bigger ones into quarters)
*note we used a mix of varieties including cherry, yellow pear, black Russian and mortgage lifter
2 brown onions (chopped)
3 green apples (peeled, cored and chopped)
1½ cups brown sugar
2½ cups of malt vinegar
½ cup of apple cider vinegar
1 tablespoon salt
2 tablespoons of mixed spice
2 tablespoons of mustard seeds (yellow)
2 red chilli (finely sliced)
Method
Step 1 Mix together all ingredients in a heavy based pot.
Step 2 Bring to the boil and reduce to a simmer to between 1 – 1½ hours. The chutney should be thick with very little excess liquid.
Step 3 Spoon the hot chutney into the sterilised jars. Seal. Cool. Refrigerate.
The chutney should keep for 3+ months and will last for up to a month after opening if refrigerated.
Tip
The jars can be sterilised a number of ways (google will help) – we found heating them in a 120 degree oven for 15 – 20 minutes the easiest.


